Table of Contents
CrossOver may not always be able to automatically install your desired Windows application, but you can follow these steps to install a program into CrossOver regardless.
Launch CrossOver
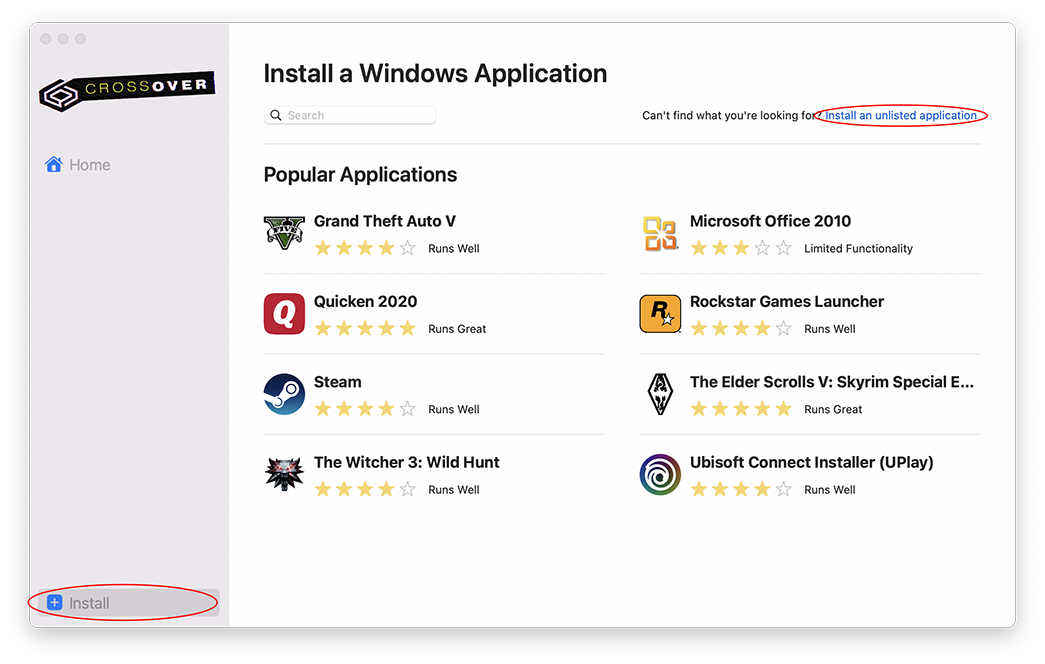
Start up CrossOver and click the Install button. Then click the Install an Unlisted Application link at the top-right.
Select the Installer File
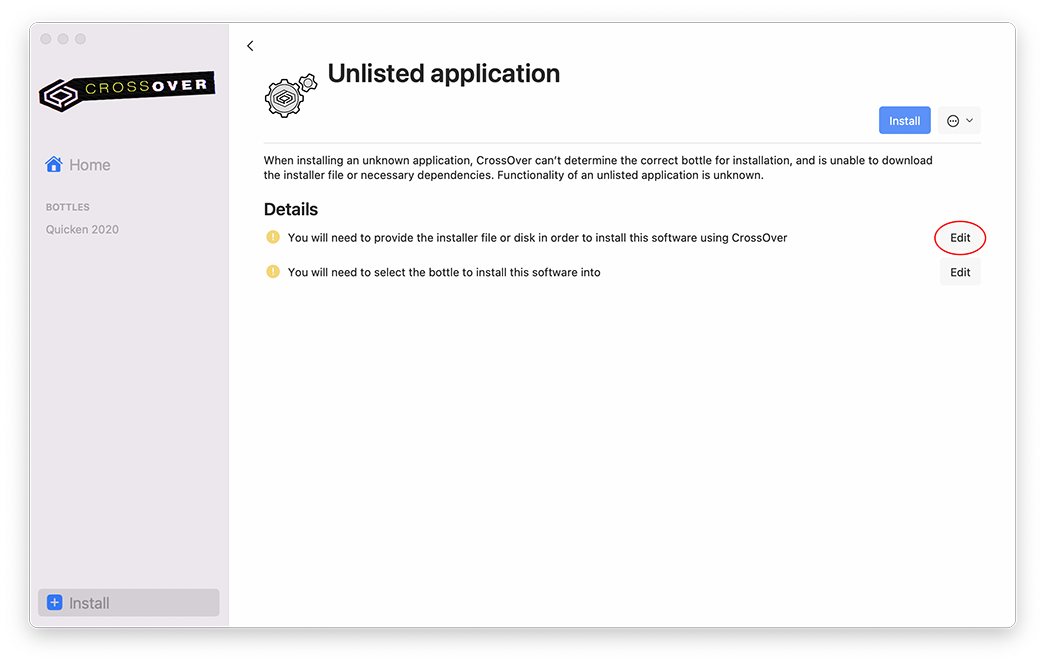
Click the Edit button to open the installer file dialog.
Locate the Installer File
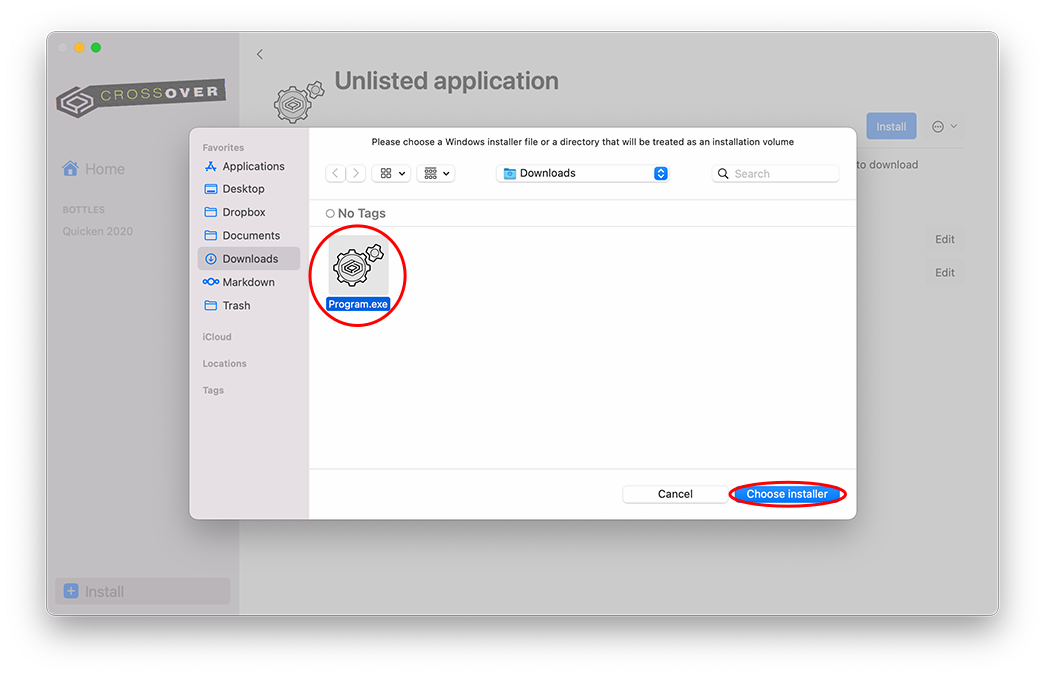
Locate the installer file for the program you are installing. Once you have selected the file, click Choose Installer.
Select Bottle Details
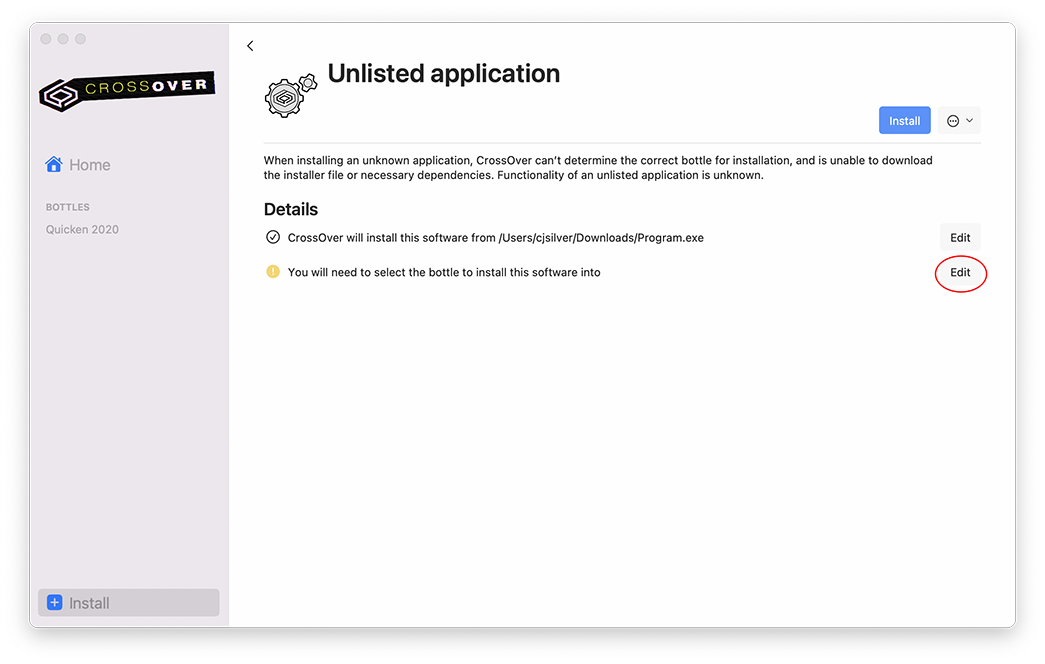
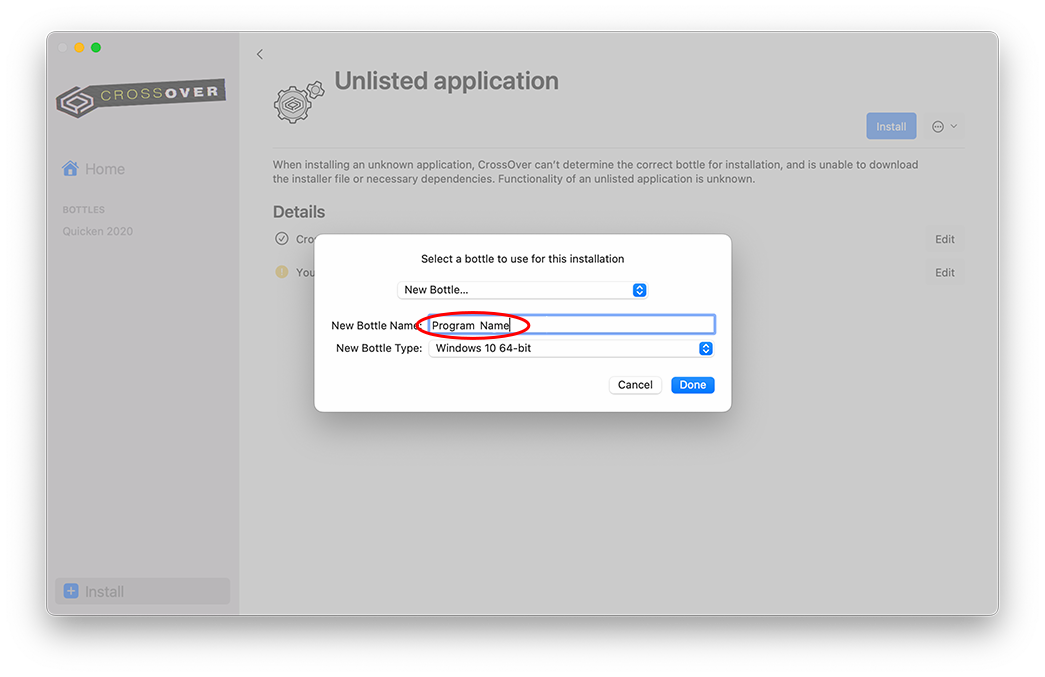
Click Edit to open the Bottle dialog.
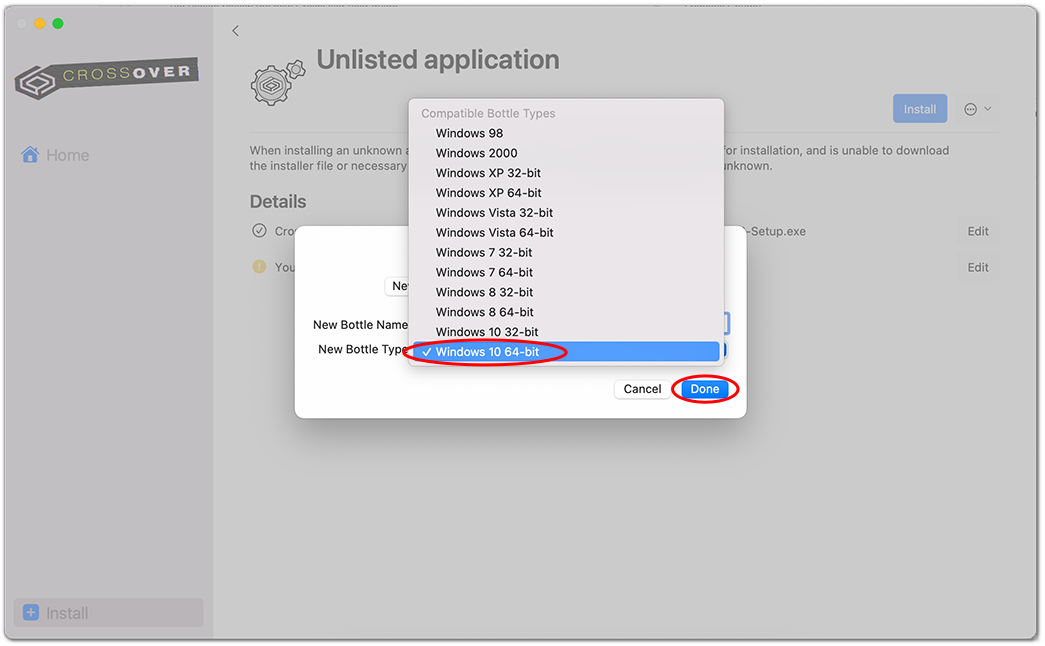
Enter the name of your bottle and select a bottle type from the list of bottles. Click Done to continue.
Proceed with installation
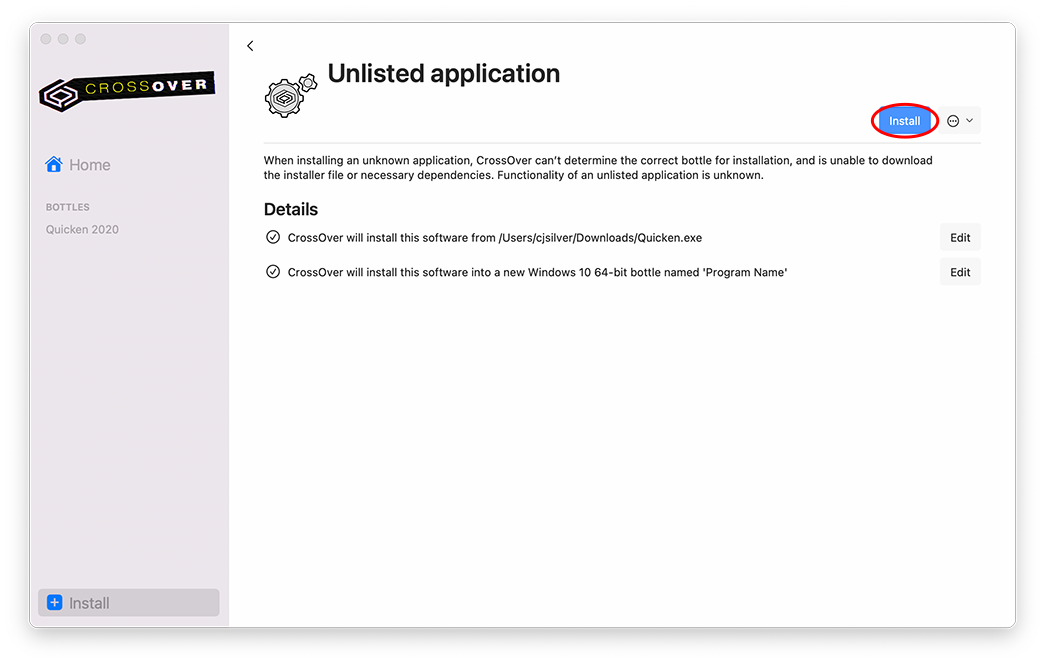
Click Install and CrossOver will create a bottle for the Windows application's files, then run the program's installer.
Follow the installation steps just like you would on Windows. Typically, leaving the install options at their defaults is fine. Once the installation is complete, CrossOver displays the contents of the new bottle. Double-click the application's icon to run your program.
If no launcher icon is created you can manually create one using CrossOver's Run Command.
You can also watch this tutorial on YouTube.
Other Articles
Installing CrossOver Mac
Installing a Listed Application in CrossOver Mac
Using the CrossOver Removal Tool
